Saturday, August 6, 2011

Who said monkey bread has to be sweet?

Although it's been months since I've updated this blog, I've actually been really, really busy, both with cooking and with "other stuff in my life that takes a lot of time," like starting a full time job (hooray!) and continuing my education (also HOORAY!) as a full time student. 

SCA-wise, we've been busy as a group, as well.  We did a medieval dinner for a local church's Father-Son banquet, and the best part of that experience, besides the delighted look on the guests' faces as they ate, was the incredible turn-out we got when I opened the kitchen to any members of the church who wanted to help us prepare the meal.  We had almost two dozen people show up!  That's more people than I have in my entire Shire, and it was an incredibly humbling and exciting experience, sharing our mutual love of cooking and family activities.

We also provided lunch for our neighboring Shire's event the day after the church dinner (ever prep for TWO meals in a single week?  We did... and I'd just started my new job AND started the summer semester... that was a trial by fire, I tell you!), and that was also lots of fun.  We always enjoy working with Shadowed Stars, and getting to feed people while visiting with good friends and family is an extra treat!

The pinnacle of our summer, however, was preparing the Royalty Lunch for Simple Day this July.  It was quite challenging, as there are a number of food allergies (and those items are relatively common cooking ingredients), so we put a lot of planning into this meal.  You can see the dishes we prepared for Their Royal Majesties and Their Royal Highnesses by clicking this link.  I'm very pleased with how the dishes turned out, especially since our entire cooking area on site consisted of a small electric skillet and some chafing dishes!

I haven't given up on baking, however.  I've been playing around with recipes to see what sort of interesting spins I can create.  A few of my experiments included pan de anis (anise bread), rose bread (white bread with rose petals and rose water), and an herb bread made with za'atar, a Mediterranean blend of seasonings and salt which is often served with flat bread and olive oil, and is a frequent breakfast in my house.

The za'atar concept led me to think of a monkey bread, but not the one with the sugar and cinnamon (I usually make that with nutmeg and ginger, since I dislike cinnamon intensely).  I don't have anything against sweet breads, but I really, really prefer savory dishes, and I decided to give it a shot!

I started off with a very basic white bread recipe.  I don't think the bread recipe really matters, I recommend using whatever you like.  However, when I made my sponge, I added a frillion (technical term) kinds of seasonings.  Some of those include garlic, onion, chives and thyme.  Again, I don't think it matters, you could use anything you wanted.  I added the spices to the sponge before letting it rest.
 Isn't she pretty?  The garlic smelled heavenly, I have to say!  So then you know the drill, eh?  Mix sponge, let rest for a while, and work up into a dough, kneading til smooth, etc. etc.  This dough had a lot of dried garlic/onion in it.... like.... probably 1/4 cup of each.  Hey, we like garlic.  So, the dough was a little more textured than usual, but not impossible to knead.  I let ir rise, then punched it down, patted it into a sort of rectangle on a floured cutting board, and cut it into beignet-sized pieces, maybe 2 inches square (this is a very, very rough approximation!). 

I melted some butter, and mixed in olive oil and some za'atar for flavour, and dipped the pieces into this mixture before loosely piling them into an oiled baking dish.  I used some small fluted pans I have, although I think any dish would work (bundt pans are often used so ensure the dough in the center cooks completely, but my fluted pans are fairly small, so I wasn't worried.).


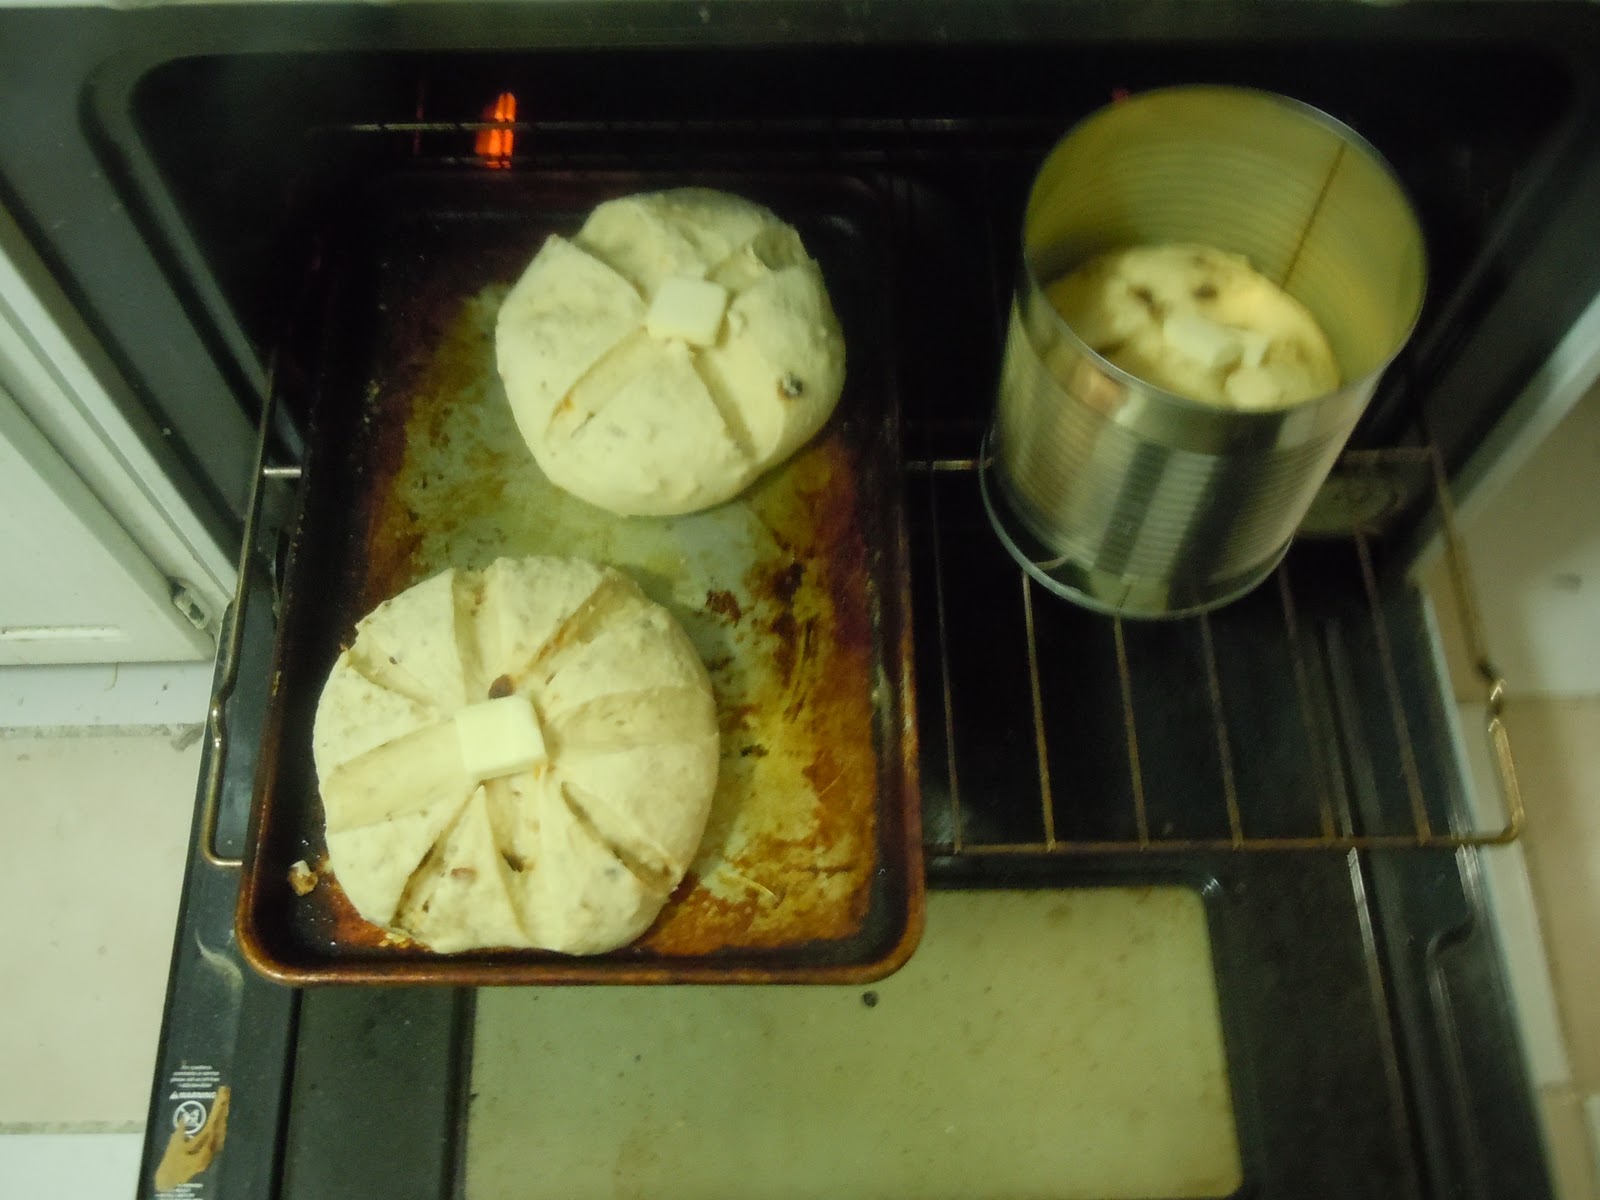
I covered the pans and let them rise until they were about doubled, and then popped them into a 350 oven for about 30 minutes or so.  There's something absolutely divine about the smell of garlic bread baking.  (Well, not if you're allergic to garlic, or are a vampire, I suppose.... since I'm neither, it's a delight!)

When the bread came out of the oven, while it was still hot I brushed the tops of each "loaf" with the remaining butter/za'atar mixture (no sense wasting good delicious herbed butter!). 


So, this bread is delicious.  I mean, drool-worthy delicious.  The garlic and herbs are really lovely, and make a great flavour combination.  The one "downside" is that unlike the sweet monkey bread, there's no sugar to cement the individual dough pieces together, so this does not lend itself to display on a platter, etc.  I've seen recipes that called for egg to deal with this issue, and I might try that next time, but I have several wooden bowls for serving bread, so this is not a major crisis. 

All in all, I call this a "win" in the bread experiment arena.  I encourage people to experiment with herb mixtures of their own and see what you can come up with!

Thursday, February 17, 2011

That's not my knickers that are twisted! A&S Project #13 - Soft Pretzels!!

Per the request of one of my shire members, who fell in love with the soft pretzel rolls served on campus, but who would like to be able to simply make them himself (and not pay the insane cost), I decided to try my hand at soft pretzels.

Thanks to the recommendation of a dear (and much missed!!!) friend, I used the recipe from Alton Brown (I love that man).  And, amazingly enough, pretzels start off like bread!  Haha!  I can do this!  So, once the bread rises, and it's punched down, it gets divided into eight even sizde hunks of dough which are then rolled out and twisted into the familiar pretzel shape.  

While the pretzels rest, 10 cups of water are brought to a rolling boil, with 2/3 of a cup of baking soda dissolved in the water.  One by one, the pretzels are dipped into the water,where they puff up slightly.  It's pretty fun to watch!


After the bagels are bathed in the boiling water, they are set on baking sheets.  The pretzels are then brushed with an egg yolk wash, sprinkled with coarse salt, and baked at 450F for 12-14 minutes.

The pretzels have to rest for 5-10 minutes and cool, and I swear, it's a test of willpower that transcends almost all others!!  The smell of warm, fresh pretzels is just wonderful.  One snag, the directions from Alton Brown indicate that you should set the bagels directly on the parchment paper when you pull them from the boiling water, but I found that the bagels stuck to the parchment paper.  I'm going to try letting them drip dry on a cooling rack before settting them on the parchment-lined baking sheet next time (tonight!  teehee.  They *were* delicious!)

I had eight pretzels to serve when dinner began.  By the end, there was one half-pretzel and a few crumbs left on the platter.  The half-pretzel was part of my lunch, and it was still delicious out of the fridge and still cold. ;)  I recommend people try this.  If you can make bread, you can very easily make soft pretzels!  My next project in this vein?  BAGELS! ;)  Stay tuned!


Tuesday, February 15, 2011

Beer sludge = bread when? A&S Challenge #12!


Sourdough fascinates me.  The concept of something that looks so... well... non-appetizing turning out bread that's delicious intrigues me to no end!

My lord brewed ale a week or so ago.  (See A&S challenge 11 for the start of this project!)  At the end of his bottling process, I asked him to save me the sludge that was left, and I made a starter out of it.  I took the sludge, about a cup or a cup and a half, added some flour and water, covered it and let it sit on a shelf in my kitchen.  I fed the little monster for about a week, stirring, adding more flour and water, a little at a time, and yesterday there was enough to do something with it.  I've never successfully made sourdough before, so I asked my 19 yr old daughter, who has been in the kitchen with somebody who's made it, to be my guide.  (I love learning FROM my kids.  So cool!)  She graciously agreed.  (Thanks, Faythe!)  So, we fed it a cup of water, a cup of flour, and a smidge of sugar, and let it sit over night.  This morning, we found bubbly goo.


This is the leftover starter, plus more flour and water to keep it going!


 Two cups of the bubbly goo (also known as "a sponge", but what's the fun in that?) went into my favourite mixing bowl, to which I also added some olive oil, salt, and about a cup and a half of flour.  I mixed it up, and was delighted by the level of gluten development already well under way.  Very gloopy!  (That's the technical term!)  My hopes were up. ;)


You can't see it, but there's a whole lotta spring in this already!
  I started mixing the flour in, about a half cup at a time, until it was fairly stiff, at which point I turned the whole batch out onto my floured pastry cloth (this was its maiden project!) and kneaded in more flour until it had the classic "this feels like a finished ball of dough should feel" spring.  I will say this batch of dough smelled like BEER!  A lot.  I am not a beer drinker, at all, and this beer is especially hoppy, at that.  All I could hope for was that the baking process would mellow that out!


My little ball of dough.  Awwwww....(hic!)
 Faythe informed me that we now had to let the dough rest for several HOURS.  Normally, my bread rises no more than two hours, and that's when the kitchen is particularly cold.  Ideally, she told me it should be left to rise all day (!!!!) but we had dinner to eat at a decent hour.  So, this dough rose for about four hours before being punched down, and it had just barely doubled in size.  (I will not question her sourdough wisdom again!)  So, doughs were formed, and I let them rise about another hour and a half, then slashed them and stuck them into the oven to bake. 

The beer smell never really left.  All that consoled me was the other foods cooking which helped tone down the beer aroma in the kitchen.   The sourdough took a little longer to bake than regular loaves, and I was concerned that the crust would be too hard, so the last half hour, I brushed melted butter on the crust about every 10 minutes, and again when it came out of the oven.  I also lightly sprinkled a little kosher salt on top of the loaves and then let them cool.


The loaves, about 10 minutes before they were finally done.
 The bread has a very noticeable beer smell and flavour that was not diminished in any way that I could tell by baking.  I really don't like beer, but my lord does (obviously.... since he made the stuff that yielded the sludge this whole process started with to begin with!), and he and some of our friends enjoyed the bread quite a bit.  The crumb was a lot lighter than I expected, which was a pleasant surprise.

I am hopeful that as the starter ages and picks up wild yeastie beasties from the kitchen, and as the beer sludge gets diluted in the next few batches to a minimal amount of the liquid in the starter, the flavour will mellow.  Even though I personally don't care for the flavour of this bread, I am thrilled beyond measure that the experiment was a success.  We had eight people at dinner, and one whole loaf disappeared handily!

Inside the Beery Sourdough Loaf

Saturday, February 12, 2011

The Man is Brewing... what to do with the spent grain? A&S Project #11!

My lord brews.  Currently, he's got a batch of ale which is doing something sinister in the dark room under the stairs (he says it's going to be ok.  I don't drink beer, so I have to trust him on this.  Besides, he sanitized the kitchen today so he can bottle tonight, so there's lots of benefit to ME in this whole brewing fiasco!).  I'm hoping to convince him to make some mead one of these days. ;)  For those of you who understand beer lingo, he likes his beer "hoppy."  I call this "hand-licker," because I think it's bitter and nasty, and you have to lick your hand to get the taste out of your mouth!


Uisdean, stirring something that still smelled good at this point! (pre-hops)

There are some side effects brewing.  One is I'm getting some actual home-grown yeastie-beasties to play with.  I'm so excited!  A new kitchen experiment!!   The other is... I have almost five GALLONS of spent grain to play with, too.

Now, I'll be honest.  By the time he's done with the grain, there's not a whole lot of value to it.  I mean, the brewing process pulls most of the "good" stuff out of the grains.  I don't have pigs to feed the leftover grain too, though, and I can't bear the idea of throwing it away.  So, I decided to try adding it to a batch of bread dough!

So, knowing that the grain I was getting was mostly just roughage, I decided to do a  nice multi-grain loaf.  This was the perfect excuse to finally grind up some buckwheat I've had sitting in my cabinets for a while.  buckwheat is a hard little grain, and I used my new, uber-heavy mortar and pestle to crunch it up into a coarse flour.

Buckwheat (see?) made by my people!

Here's the buckwheat about half-way through the grinding process.  (It took me about 30 minutes to grind up one cup of grain)


 I also added barley flour, and regular old all-purpose wheat flour.  Once I had that mostly kneading into a basic dough, I added two cups of the spent grain.  It smelled funky, I'm not going to lie.  Not like beer, but rather like wet grass clippings.  My lord rolled his eyes at me and told me it was HOPS, not grass clippings.  I remain unconvinced, but hey, grain's grain.  So, I added it in and worked it into the dough, which took on a somewhat grainy texture (pun fully intended!)

Dough with spent grain dumped on top

 So, you know the drill by now,  loaves go into oven, Solveig finds something to work on (embroidery, research, accounting homework, whatever) until the smell of baking bread fills the house, loaves are pulled out and left to cool for a little while.

We served this at dinner at our business meeting last weekend. The loaves turned out really nice.  It was definitely a more "peasant bread" look, and the crumb was larger, but it was still light, and there wasn't any real icky hoppy taste in the bread, thank goodness! ;)  Good news... I have enough spent grain to make about 500 more batches!  (Most of it is out in the freezer in freezer bags... even I can only make so much bread at a time!  Shhh... don't tell!)


Loaf shaped, risen and slashed!

Peasant bread, mixed grains, with spent grains mixed in for texture and fiber.


Friday, February 4, 2011

What's in (an SCA event) lunch?

The Enemy!!!


Most SCA events I've gone to which included a feast also have a lunch available.  Now, let's be realistic for a moment.  (I know, bear with me, please...).  Few people are going to break out their feast gear for lunch.  Lunch is an afterthought, perhaps a delicious afterthought, but it's really more of a convenience to the assembled Gentles than an actual embellishment to the event.  If people are going to experience "The Dream" in conjunction with food, it's going to wait for Feast, which is several courses, and usually has some "schtick" to add to the experience. 

So lunch becomes an afterthought, a chance to break the mid-day hunger that doesn't require going to the local Scottish place (McDonald's.. haha!  Get it?) in garb, and so on.  For the group hosting the event itself, lunch can be an extra bit of work, as their cooks are usually involved in the (sometimes daunting) task of preparing Feast. Because it is sometimes a bit of an afterthought, and it needs to be convenient (and affordable!), lunches sometimes are a wee smidge lacklustre in their offerings. And, worse, they are sometimes exceedingly *modern* in their execution. Having done a dozen or so lunches now, I recognize the delicate economic balancing act which lunches require. People are not seeking "culinary excitement", they want something to eat to tide them over til feast (or until the event is over and they can head to a local restaurant).  

Many, many groups farm out lunch, and for smaller groups like my Shire (affectionately known as "The Good Eats Shire" by some... we do so like to cook, in case it wasn't readily apparent!), lunch can be a great opportunity to be part of a larger event, and even make a little money!  It can also be the cause of a lot of stress and frustration, for both those serving and those eating.  Food Should Be Fun!  How? Well, let's find out!

There are three main areas to consider when planning a lunch.

1.  Cost.  Cost includes the food, the dishes you're going to serve the food in, and the cost of any gear you need to transport/prepare the food.  With most lunches running right around $5 per plate, the fare you offer is not likely to include rare and exotic ingredients.  (I don't consider fennel exotic.  Saffron, yes.)  How are you going to make food that tastes good, but doesn't anger your exchequer?  Don't forget you'll want to try out any new recipes in advance.  Nothing creates stress like a new recipe you've never made before which fails at the last minute, just as patrons are lining up to hand over their money for your lunch... 

Styrofoam is glaringly modern, but disposable bamboo bowls and plates are about 800 times as pricey (yes, literally), and keeping 100+ wooden or stoneware bowls in inventory can be expensive, a storage challenge, and potentially a sanitary nightmare, as you have to sanitize the bowls before and after the lunch! (KITCHEN MARSHAL NOTE #1:  Sanitary issues are Important Things!  Don't ignore them!) So, given that the average lunch is about $5 per plate, that doesn't really give the lunch steward a lot of wiggle room in profit, and I can attest to an 800% increase in costs being untenable.  (As much as I wish it were not an issue, especially for a smaller group like us, losing money is considered "a bad thing" and my exchequer glares at me when it happens!) 

Do you have the crock pots, stock pots, ladles, pitchers, or other gear you need to prepare and serve the food you've planned for lunch?  Depending on the menu, your needs will change, sometimes radically.  A winter lunch might include several choices of hot foods.  Crock pots are excellent for this purpose, keeping food warm while you serve it (my lord and I own six crock pots between us plus a large roaster which doubles as a hot food serving station, not to mention the Shire's crock pot.)  A summer lunch might include dishes which simply need to be kept in dishes which are immersed in bowls of ice to maintain temperature.  (KITCHEN MARSHAL NOTE #2:  Proper Food Temperature Matters!  Unsure of what temp you should keep foods at?  Click here for one excellent resource! ) 

2.  Space.  Where will you be serving lunch?  Do you have a lunch counter?  Long tables where you can sprawl out?  A concession window?  Will you have access to the kitchen for prep and clean-up?  These will impact the way lunch is handled, and should be discussed with the group hosting the event when arrangements are made initially.   While it may not seem like it to those who are not in the kitchen, Feast Stewards tend to get a wee smidge crazed around 1pm, and you may need to delicately negotiate access to the dish washing station.  I recommend hiring mercenaries to facilitate this process (I'm kidding... sort of.).  You really do not want to have bacteria growing on your serving dishes for hours as they stew in the trunk of your vehicle, do you?  That being said, I've been in enough feast kitchens to have a little empathy for those who are racing towards the feast finish line, and you'd be well served to designate one or two "official dish washers", and have the rest of your lunch staff move things as quickly as possible out of the way, and then vacate the premises.  The sooner you're out of the feast staff's hair, the less likely you'll be to need those mercenaries!


Members of the Afonlyn Cook's Guild serving lunch.  Note the aprons (stencilled with the Afonlyn populace badge) and caps.  The aprons were Server Gifts from a previous event, and caps were made at dedicated A&S nights as garb projects for both men and women.

3.  MOST IMPORTANT --- The Food!  Nothing frustrates me more than going to an event and planning on getting lunch there, only to find food which would be better suited for an elementary school cafeteria.  Seriously?  Pizza Hut?  Chicken Soup fresh out of the can?  Wal-Mart white bread!?  Granted, my kids are slightly skewed in their perception of what makes up "good food," but I've stopped buying lunch at events much of the time, because I got tired of hearing the sad whisper of, "Mommy, this soup has no flavour," accompanied by the sadder eyes of a child who expects food to be edible and has been let down (The Emergency Flavour Chest was created to deal with this issue at feast... it's a small wooden chest which has little containers of various spices and herbs, just in case!).

Now, this is a lunch.  I recognize that.  I don't think people expect (or desire) Haute Cuisine at lunch.  The Royals are likely off in The Royalty Room eating a separate meal prepared for them, so you're not trying to impress the crown (although I freely admit I lust after the job of Royalty Lunch Liaison...)  As the group serving the mid-day meal, you're competing with McDonald's-type offerings, not a full service restaurant.  That being said, there's no reason you can't offer a nod to the medieval atmosphere while providing food people will enjoy eating.  Taking into consideration the budget available to you, and the time of year, and the space you have available, lunch can be an extra bit of "medieval experience" to maintain "The Dream" while fitting into everybody's budget. 

There are a plethora of period recipes for quick and easy dishes which can be adapted to lunch menus.  Especially with the growing number of vegetarians in our ranks, "Lenten" recipes often can be a source of inspiration, and they are readily available.  Maybe theme your lunch to match the event. (If you do this, make sure you preview the feast menu, or contact the feast steward, to make sure you're not duplicating something they're offering.. that's bad manners!)  Perhaps a nod to the season is in order.  Spring events mean fresh fruit is affordable, and people are ready for lighter fare, after the long dark season of hearty stews and soups, after all!  One of my favourite ways of pulling a menu together is to play with the heraldic concepts of colours.  The Midrealm has easy colours to match to the food... red and green?  Easy-Peasy!  And delicious, too!

Your lunch menu doesn't have to be worthy of elevation to the Laurels.  It's amazing how with just a little extra effort, however, you can enhance the event with your offerings, and allow your guests to maintain the illusion of "The Dream", while still turning a profit.  Also, lunches are an excellent opportunity for smaller groups to get experience serving meals.  Afonlyn is a very small shire.  We're slowly adding to our gear, and working on improving our presentation.  Recently we added 40+ small silver trays for patrons to carry their lunches on, with positive reviews!  We're planning on making tablecloths and hot pads to improve the look of our lunches.  It's a never-ending goal of improvement, but we are passionate about sharing good food with people.  You might say it's a "hunger" of sorts. :)

The menu from a recent lunch Afonlyn served.  On the reverse, an ingredient list was made available. (That's what the fine print says on the bottom!)

Tuesday, February 1, 2011

A&S 50 Project #10 - Panettone

Panettone is normally seen around the Christmas holiday, and the legends vary (as these things do), but the origins may be in Milan, in the 15th century.

Panettone is a very rich, light cake-like bread studded with fruit and nuts.  It starts off with a simple sponge, which is left to rest for 6+ hours, before butter and eggs and egg yolks and sugar and milk and more flour are all mixed in, creating a very elastic, responsive dough.  No doubt the extended sponge resting time has something to do with this.


Here you can see the sponge after warm milk, salt and butter have been added, and mixed until almost a pancake-batter consistency is achieved.  From here, the eggs, which are beaten with sugar until light and frothy, are mixed in, and then you proceed much like a regular bread dough, working in flour a little at a time until it bounces back.  Once the dough is kneaded, it rests while you prepare the fruit and nut mixture.

 My recipe called for anise seeds, but as you may have heard, Indiana is buried under ice, and I wasn't going out for anise.  So, I substituted fennel instead, and I don't like pine nuts, as a general rule, so I used almonds instead because, well, I had them in the pantry!  I ground the fennel fairly fine, then added the almonds to the mortar and crunched them up.
Again, the original recipe calls for citron and raisins.  Well, I don't like citron (YUCK!  I can not abide that stuff), and I thought apricots and dates sounded more fun, anyway. :)  So, I chopped them up, about a half cup of each (the recipe calls for a half cup total, but eh... what's a little more dried fruit among friends?)

So, the dough was resting for the time it took to grind, chop and mix the fruit and nuts, and then I patted it out into an oval, pouring my "tasty bits" on top, and then I began to knead.  And knead.  And knead.  And knead.  It's harder to mix in fruit and nuts this way than one might think, and I wanted to make sure I had the fruit evenly distributed through the dough.  So, I worked the dough for about 10 minutes, without having to add too much additional flour.  I didn't want to make the bread tough!  I just wanted it good.

The final ball of dough was lumpy with bits of fruit sticking out, but it felt good, still light and elastic and the fennel just smells good!  The dough is left to rise for almost two hours, and then shaped into loaves.  There are lots of ways to shape panettone.  The "As Seen At Christmas" type is usually a tall, round loaf, looking somewhat like a muffin on steroids.  I don't have a souffle pan (or a schnazzy special panettone pan!), but I do have a couple of clean, empty #10 steel cans I've scrounged from a couple of other projects (Better War lunch, for one...) and that worked fabulously as a make-shift round pan.  The other two loaves were shaped on a baking sheet.  Again, they had to rise, and given the raging ice storm outside, it's not unpleasant having bread rising with the oven preheating!

Right before baking, I slashed the loaves.  The one in the pan wasn't quite to the top, so that was a bit dicey, but the hearth loaves were easy enough.  I slashed one in the traditional "x" shape, and the other with a double "X".  The recipe said to put the loaves in the oven for five minutes, then place a tablespoon of butter at the center of each "X" before continuing the baking process.

The fruit and the fennel and the bread, baking in the oven with the light undertone of browning butter as it melted into the bread and drizzled onto the baking pans was intensely wonderful.  (One of the best side effects of being a baker.. my house smells amazing!)

Once it came out of the oven, I wanted to get the round loaf out of the pan as soon as possible, so it wouldn't stick to the ribbed side.  Oops, one small corner had not been greased enough, apparently, and a small chunk of the bread was stuck.  However, the loaves are very light, and rich, with distinct markings and beautiful colour.  The crumb is delicate, and the bread?  All I can say is... Delizioso pane!

Friday, January 14, 2011

Dancing on the razor's edge... literally!

Today I want to share my delight in the joys of having an amazing tool in your hands.  That tool, my friends, is a simple razor blade.  (I'm fairly sure the cashiers at my local stores are convinced I'm a lunatic... They see me shopping for groceries in garb a couple of times a year, I buy the "weirdest" vegetables AND rave about the delicious ways to prepare them, and now I was all giddy about finding this particular razor blade!)

I've been baking bread a while now.  I've been approaching it from a more scientific perspective for about two years, and I'm always fascinated by what slashing the dough prior to baking does to a loaf.  Do you slash it before it rises?  After it rises?  Not at all?  Which direction, what angle, the questions are myriad, and the various approaches all create a different look and, in some cases, dramatically different results!

For all this time, I've used kitchen knives to do my slashing, with varied results.  I've never ended up with inedible bread as a result, but I've been seeking something that will allow me more precise control over the bread dough, and a paring knife is at a weird angle and doesn't do what I want it to do.

So, there's this schnazzy tool called a "lame" (you can see a picture by clicking here) which is supposed to be the tool of choice in French bakeries.  I've had good French bread (we lived in New Orleans for five years, where bread is a point of pride for bakers...) but the more I considered this gadget, the more I was seeing people complain about it, and the same refrain kept repeating.  People were using a single-bladed razor blade instead.

We had to go to the store anyway, so I decided to get some razor blades.  After a fruitless search near the razors, I sidled into the hardware section where I came across this little gem.  For the huge investment of $1.98, I got this "mini glass scraper" with a washable plastic holder and five razor blades.  I was probably more excited than anybody expected me to be, but it's such a delight to find the tool you've been seeking at a bargain!  I'm not ashamed of my passion for baking! 

Our weekly Sewing Circle was last night, and I was rushing around getting ready, with a huge pot of potato soup simmering, and bread dough rising in the bowl, when I remembered my new toy!  I didn't even have time to research methods of application, I just slashed and baked.  This particular batch of dough combines whole wheat, regular bread flour, and milled flax seed.

I tried two patterns, the first being a series of three vertical cuts along the length of the bread, one on the top and one along each long side.  This loaf is very small, probably about 3/4 pound of dough.  (The scraper you see in the "before baking" picture is fairly small, taking a regular sized razor blade, for reference.)  I slashed the loaves right before baking, very shallow cuts, about 1/8", and perpendicular to the surface of the dough, just to see what would happen, and it created a very pretty look.

The second loaf was slightly larger, and longer, so I ran several diagonal slashes down the length of the loaf, again just before baking, also very shallow.  I am very much still in the experimental stage (I expect I will be in this stage for the rest of my life, it's just so fun to play with bread dough!), so I didn't want to overcomplicate the process.  I like the way this came out, although I would probably recommend deeper slashes for this look, and possible slashing before rising. 

I also brushed the loaves with salt water a couple of times during the baking process.  (Sewing Circle Night is perhaps not the best time for lengthy bread experimentation!  Too much going on!)  The came out nice, with a chewy crust and a nice crumb, and the razor blade is definitely more precise than even the smallest of our kitchen knives.  I am a convert!

I would share pictures of the inside of the bread, but it was, ~le sigh~, inhaled by the participants in our A&S evening, and not even crumbs remain.  However, that is the truest compliment I could ever ask for, so I will call this experiment a success!  I can't wait to try new refinements in using this new kitchen tool! 

Happy Baking!